In this tutorial, I will guide you step by step through installing the outstanding home automation platform Jeedom by migrating it from an older Debian 8.5 system to a fresh Debian 10.3 Virtual Machine (VM). Not only will I cover the installation, but I’ll also demonstrate how to restore a fully functional Jeedom V3 backup.
I embarked on this migration because, over time, issues related to Python packages and dependencies were making Jeedom upgrades increasingly unstable or difficult to perform, particularly for certain Jeedom plugins.
Please note that I did not specifically choose the simplest way to install and restore Jeedom 🙂
Step 1: VM Configuration
For my Virtual machines, I run VMWare vSphere 6.5 (free edition) on an Intel NUC, this is perfectly supported (except the sound card but we don’t need it for this use).
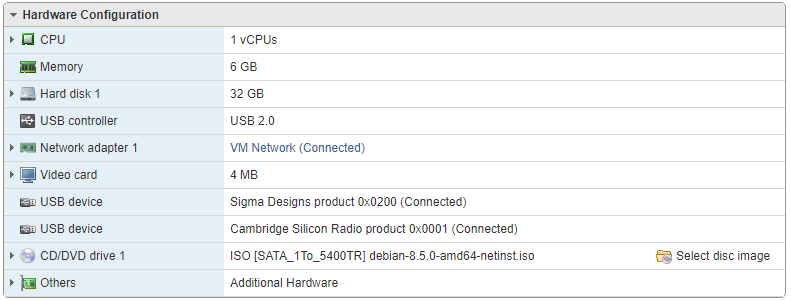
Here is the configuration for my actual Debian8.5:
First i’ll deploy the netinstall version of Debian 10.3 on my vSphere datastore. Then i create a new VM with the same capacity of the old one, it ran smoothly.
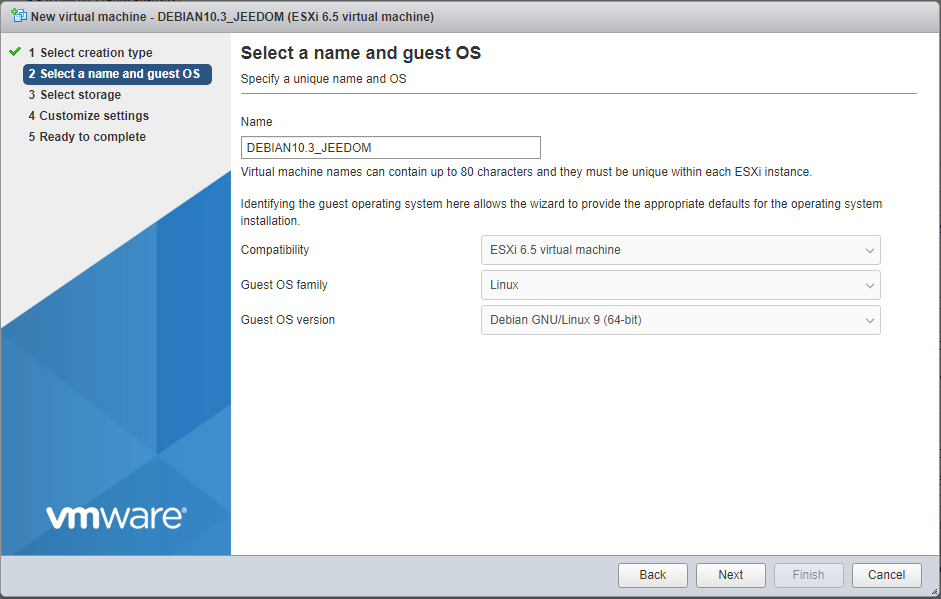
Note that i’m not running the latest vSphere update … Debian 10 is not known in the dropdown list. It’s not a problem.
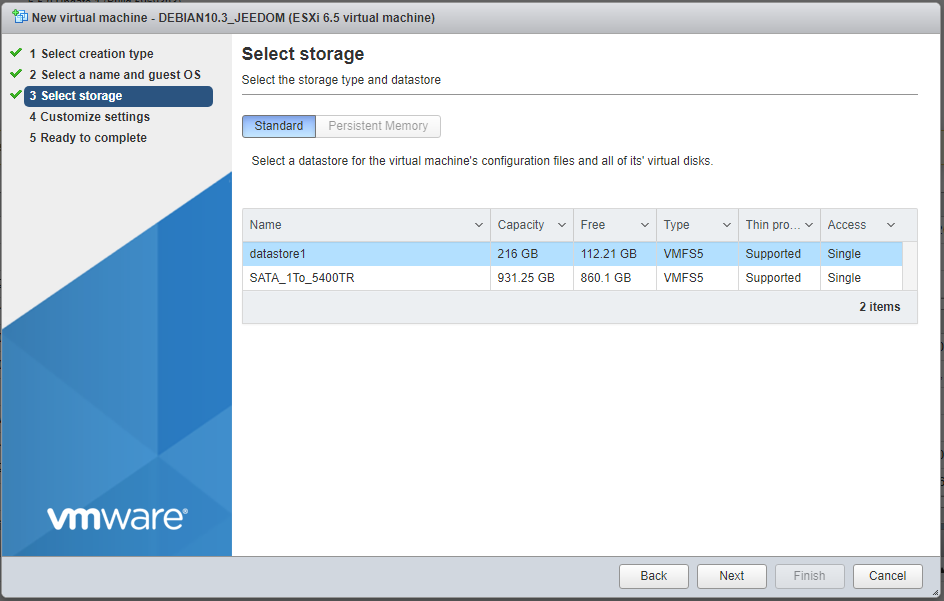
I’ll use my “datastore 1” datastore, it is an SSD drive.

Same settings as the old Debian 8.5 VM. Note that you need to change the dropdownlist selection inside the CD/DVD Drive, to use your Debian iso file downloaded & uploaded on your vSphere datastore earlier.
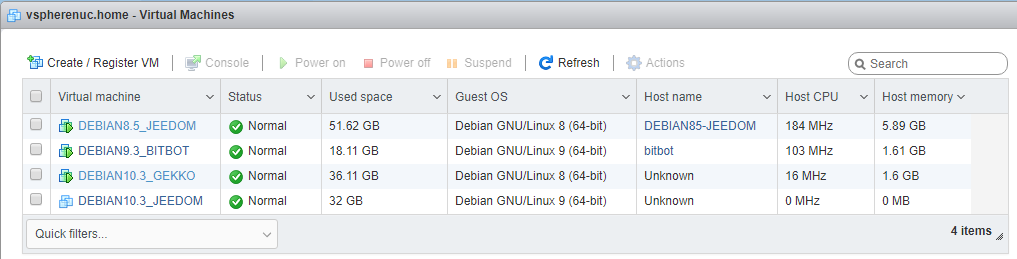
Once created, here is the list of all my VMs. I made some cleanup before. Notice I’m also upgrading my gekko trading bot VM from a Debian 9.3 to a new 10.3 VM. Now let’s start our Jeedom 10.3 VM.
Step 2: Debian Installation
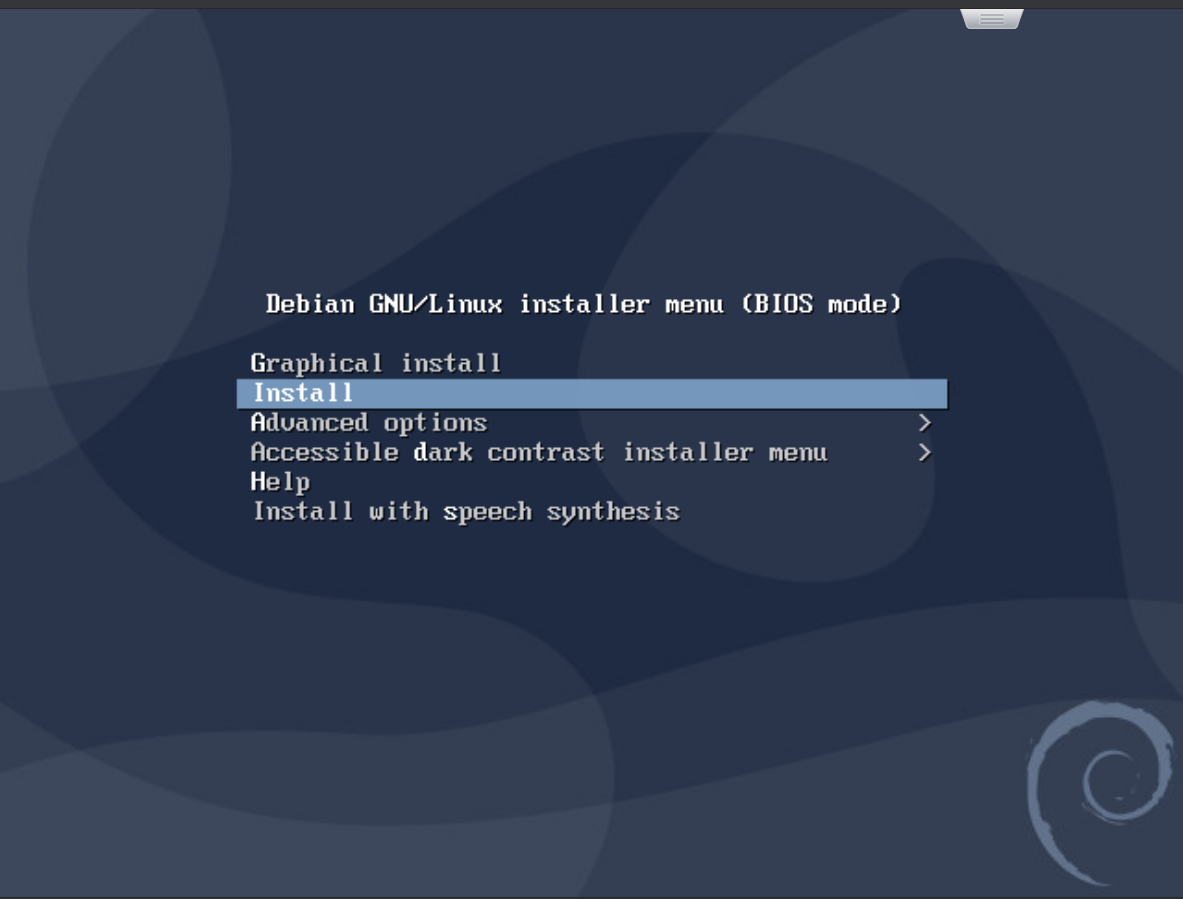
No graphical installation is needed; I’ll proceed with the text installer. Here are the key options I chose:
- French language, timezone, and keyboard (nobody’s perfect)
- DEBIAN10-3-JEEDOM as hostname
- Domain: home
- After setting the root password, I created a new ‘jeedom’ user
- I chose LVM to partition the disk. I did not do it on my previous 8.5 install (don’t remember if the choice existed), but it will be easier in the future if we need to add some disk space or change existing one.
- I chose to split /home, /var, and /tmp into separate partitions. This greatly helps prevent users or applications from filling up your disk, for example due to excessive logs in /var/log, or malicious filling of /tmp by misbehaving applications
- I recommend to allocate at least 5Gb to var. In my case, as my old Jeedom database is huge, it completely filled the /var directory when I made a first attempt with default LVM settings.
- Then simply follow the prompts until the installer downloads and installs all required packages.
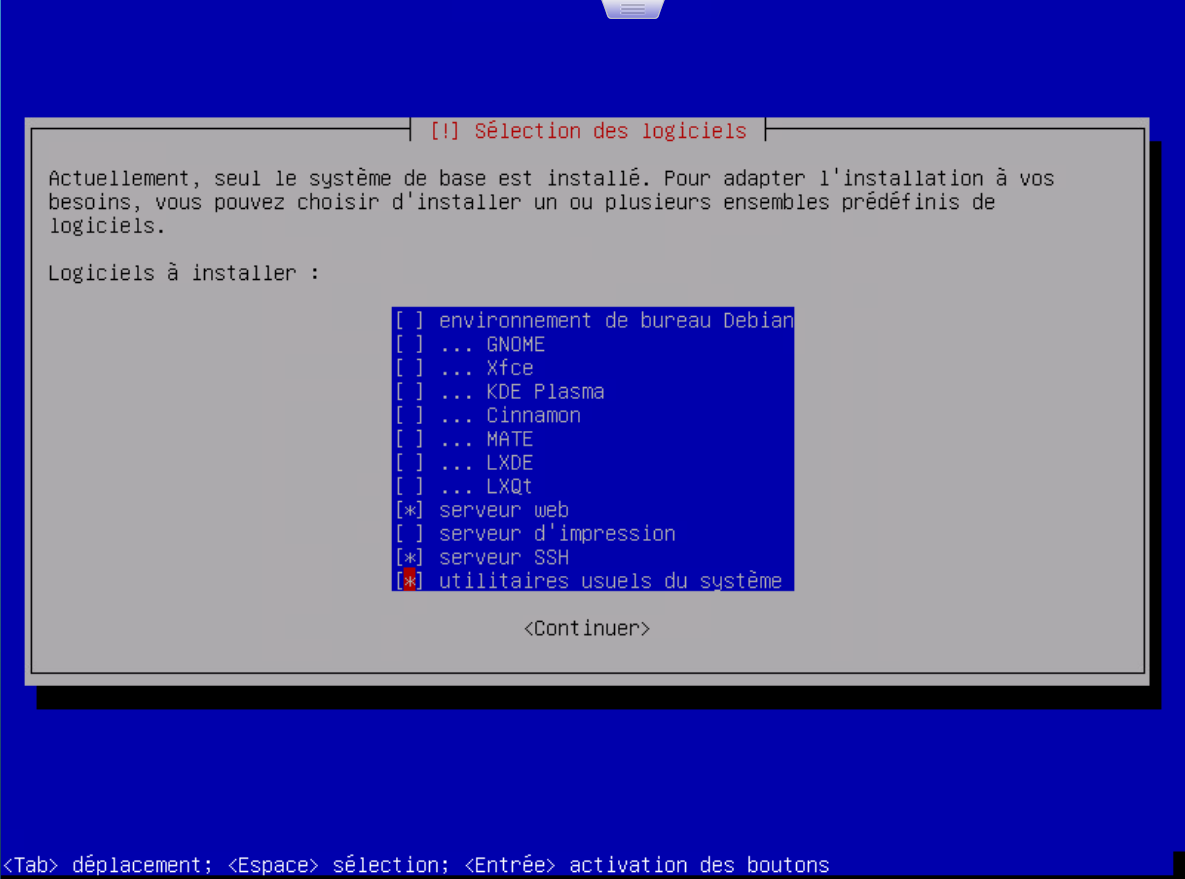
- In my case I didn’t need a proxy server, no desktop environment
- However, I do ensure to install both a web server (Apache) and SSH server.
The install process will again download & install the required packages. I’ll choose to install GRUB on /dev/sda as it will be the only OS on this VM.
Now we reboot. Don’t forget to remove the Debian Install ISO from the Virtual Machine configuration in vSphere.

Then i’ll connect on the VM with the VMWare console, and update the VM with:
su -
apt-get update
apt-get upgrade
apt-get install joe net-tools
Installing the ‘net-tools’ package will allow us to use ‘ifconfig’ to get our IP address (you can of course also check your DHCP server, probably on your router or internet box).
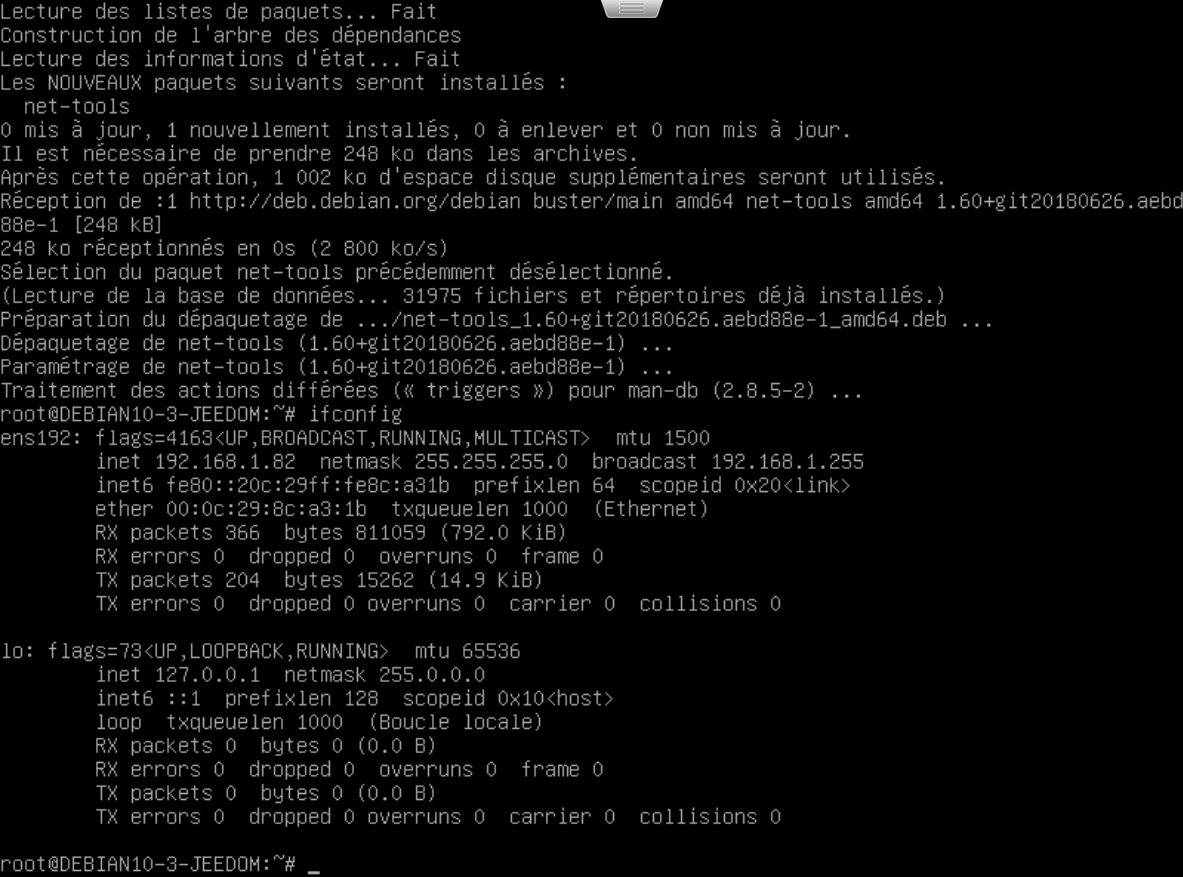
Hint: this is the moment you want to define this IP address as a static one on your router so it won’t change in the future. This is a must for jeedom as some equipments or routines will refer to your system by using its IP address.
We also want to install the VMWare tools. I won’t install the ones from my vSphere installation since it is not up to date. I’ll install the Open VM Tools.
apt-get install open-vm-toolsWhen prompted, press y to continue, it will install a few dependencies, and when it’s finished, as we installed a buch of things, I suggest to reboot the VM by using:
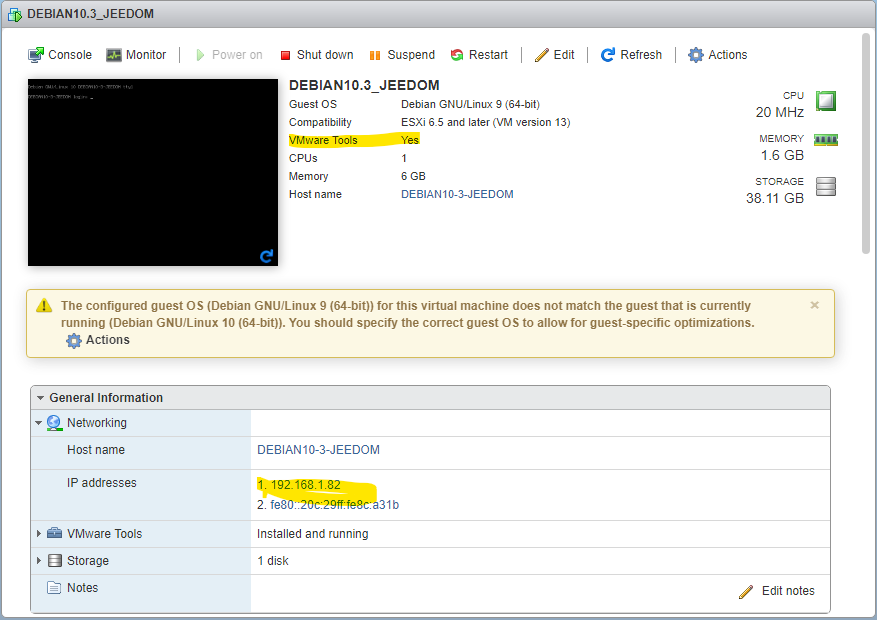
reboot -fNotice the difference on your vSphere UI: we now see the IP address, and vSphere does see the VMWare tools installed. Perfect.
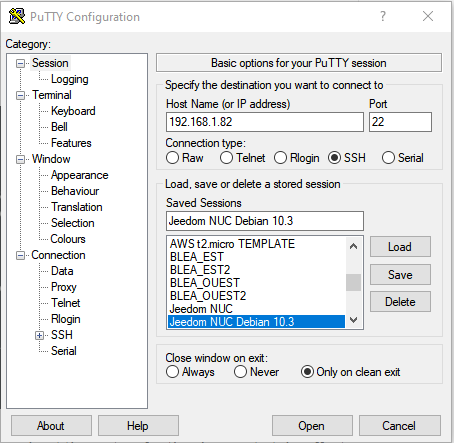
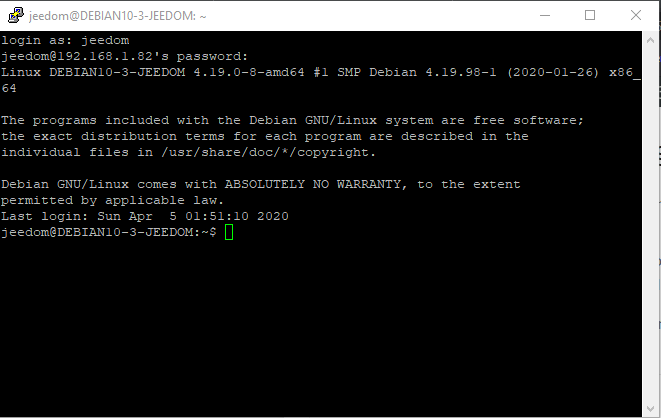
Now you should be able to SSH to your VM. I’m using Putty from a Windows desktop.
Step 3: Jeedom installation
What is following is extracted from various parts of the Debian installation process from Jeedom documentation (§1 & §4 + some links from it). I won’t follow exactly the documentation as the standard Jeedom’s procedure would install jeedom in the default Debian /var/www directory, and I changed that on my previous installation: the whole Jeedom installation website will in fact be located in /home/jeedom (root of my jeedom user). This is the first “complication,” and yes, it will require some changes to the default httpd (Apache) configuration file.
First we will install some new utilities.
su -
apt-get install -y sudo fail2ban ffmpeg
usermod -aG sudo jeedom
With these lines, you’ll install sudo, fail2ban (for limiting abusive connection attempts), and ffmpeg (needed by Jeedom). Adding the ‘jeedom’ user to the sudoers group allows administrative actions. Now as I dont want my sudoers to enter the root passwd, i’ll edit the /etc/sudoers file and change (or comment) this line:
%sudo ALL=(ALL:ALL) ALLWith this one:
%sudo ALL=(ALL) NOPASSWD: ALLNote: be aware that relaxing sudo or MySQL privileges, such as removing passwords or granting SUPER rights, reduces security. Only apply these changes in trusted environments.
Now with the user jeedom you should be able to perform root actions by using (for example) ‘sudo ls -al /root’.
Then we will install Jeedom, and once it’s done we will restore our backup.
su -
wget https://raw.githubusercontent.com/jeedom/core/master/install/install.sh
chmod +x install.sh
./install.sh
Note #1: in case you are installing jeedom on an already existing system with a running version of mysql, you can pass arguments to the script (eg. ./install.sh -w /home/jeedom/html -m Jeedom) to directly deploy it in /home/jeedom/html and avoid a few operations to move it later, as I did (also note the -m to force the mysql user Jeedom will have to use).
Note #2: in case you want to reset the previous Jeedom installation steps and rerun it with a clean database & target html dir, perform the following steps on the new VM (NOT the old one !):
- Clean the /var/www/html directory OR /home/jeedom/html in case you will use the -m command line option with Jeedom’s installer,
- Remove the MySQL Jeedom database and user as shown below.
MariaDB [(none)]> show databases;
+--------------------+
| Database           |
+--------------------+
| information_schema |
| jeedom             |
| mysql              |
| performance_schema |
+--------------------+
4 rows in set (0.001 sec)

MariaDB [(none)]> drop database jeedom;
Query OK, 28 rows affected (0.102 sec)

MariaDB [(none)]> SELECT User,Host FROM mysql.user;
+--------+-----------+
| User   | Host      |
+--------+-----------+
| jeedom | localhost |
| root   | localhost |
+--------+-----------+
2 rows in set (0.000 sec)

MariaDB [(none)]> REVOKE ALL PRIVILEGES, GRANT OPTION FROM 'jeedom'@'localhost';
Query OK, 0 rows affected (0.000 sec)

MariaDB [(none)]> DROP USER 'jeedom'@'localhost';
Query OK, 0 rows affected (0.001 sec)
Running the install script will install a bunch of packages: mysql, php, python dependencies, etc. At the end it should display a successfull message, and you need to securely store (and be able to retrieve) the root mysql password displayed, in case you didn’t choose to reuse an existing database or user as noted above.
Step 4: MySQL tweaking
This step is optional if you chose earlier to reuse an existing Mysql user or existing DB.
Restoring root password and privileges
We will now change the root passwd for mysql, to restore the one used on our Debian8.5 installation, and give more privileges to the jeedom user (this is needed to restore some stuff during the old Jeedom database restoring).
Hint: we can see the MySQL password from the running Debian 8.5 Jeedom UI, in the configuration menu, then OS/DB tab.
mysql -u root -p mysqlHere you need to use the root password for the Mysql Database you defined in your install script, or noted after the Jeedom installation. Then, use those commands to change the root password (if you want to) and give full SUPER privileges to the jeedom user,
FLUSH PRIVILEGES;
SET PASSWORD FOR root@'localhost' = PASSWORD('YOUR NEW PASSWORD');
FLUSH PRIVILEGES;
GRANT ALL PRIVILEGES ON jeedom.* TO 'jeedom'@'localhost' WITH GRANT OPTION;
GRANT SUPER ON *.* TO 'jeedom'@'localhost';
FLUSH PRIVILEGES;
Moving database files
Next, I’ll want to move the default mysql database files from the default dir /var/lib/mysql to my /home/jeedom HOMEDIR, where there is more disk space.
First we make sure about the default mysql datadir used for storing data. While you are still connected to MySQL, enter this command. It displays the path to the database files.
MariaDB [(none)]> select @@datadir;
+-----------------+
| @@datadir       |
+-----------------+
| /var/lib/mysql/ |
+-----------------+
1 row in set (0.000 sec)

MariaDB [(none)]> exit;
We stop mysql and check it is well stopped (look for a line “Status: “MariaDB server is down”” in the systemctl status output).
systemctl stop mysql
systemctl status mysql
We’ll copy the existing database directory to the new location with rsync. Using the -a flag preserves the permissions and other directory properties, while-v provides verbose output so you can follow the progress. And we rename the old database with a specific .bak extension, so that we we ensure mysql can not use this one anymore. It could be removed after ensuring the restoration is 100% completed.
rsync -av /var/lib/mysql /home/jeedom
mv /var/lib/mysql /var/lib/mysql.bak
Now I’ll edit the /etc/mysql/mariadb.conf.d/50-server.cnf file (Debian specific) to change the datadir directive and point it on my new location.
datadir=/home/jeedom/mysqlAnd edit /etc/apparmor.d/tunables/alias to create a pointer between mysql old dir and new dir.
alias /var/lib/mysql/ -> /home/jeedom/mysql/,And we restart AppArmor.
systemctl restart apparmorBefore restarting mysql we will need to create a basic directory structure in the old files directory as it checked by the default mysql startup scripts.
mkdir -p /var/lib/mysql/mysqlAnd we will need to authorize Mysql/MariaDB to be run from the /home directories by addind an authorization.
systemctl edit mariadbAdd this new section to configure an “override” to the default MariaDB systemd unit.
[Service]
ProtectHome=false
Then we need to reload systemctl configuration files.
systemctl daemon-reloadAnd we restart Mysql, and check it is running well.
systemctl start mysql
systemctl status mysql

systemctl status mysql

root@DEBIAN10-3-JEEDOM:/home/jeedom# systemctl status mysql
● mariadb.service - MariaDB 10.3.22 database server
   Loaded: loaded (/lib/systemd/system/mariadb.service; enabled; vendor preset: enabled)
  Drop-In: /etc/systemd/system/mariadb.service.d
           └─jeedom.conf, override.conf
   Active: active (running) since Fri 2020-04-10 13:33:19 CEST; 51s ago
     Docs: man:mysqld(8)
           https://mariadb.com/kb/en/library/systemd/
 Main PID: 15792 (mysqld)
   Status: "Taking your SQL requests now..."
    Tasks: 33 (limit: 4915)
   Memory: 54.3M
   CGroup: /system.slice/mariadb.service
           └─15792 /usr/sbin/mysqld

avril 10 13:33:19 DEBIAN10-3-JEEDOM mysqld[15792]: 2020-04-10 13:33:19 0 [Note] /usr/sbin/mysqld (mysqld 10.3.22-MariaDB-0+deb10u1) starting as process 15792 ...
avril 10 13:33:19 DEBIAN10-3-JEEDOM systemd[1]: Started MariaDB 10.3.22 database server.
avril 10 13:33:19 DEBIAN10-3-JEEDOM /etc/mysql/debian-start[15827]: Upgrading MySQL tables if necessary.
avril 10 13:33:19 DEBIAN10-3-JEEDOM /etc/mysql/debian-start[15830]: /usr/bin/mysql_upgrade: the '--basedir' option is always ignored
avril 10 13:33:19 DEBIAN10-3-JEEDOM /etc/mysql/debian-start[15830]: Looking for 'mysql' as: /usr/bin/mysql
avril 10 13:33:19 DEBIAN10-3-JEEDOM /etc/mysql/debian-start[15830]: Looking for 'mysqlcheck' as: /usr/bin/mysqlcheck
avril 10 13:33:19 DEBIAN10-3-JEEDOM /etc/mysql/debian-start[15830]: Version check failed. Got the following error when calling the 'mysql' command line client
avril 10 13:33:19 DEBIAN10-3-JEEDOM /etc/mysql/debian-start[15830]: ERROR 1045 (28000): Access denied for user 'root'@'localhost' (using password: NO)
avril 10 13:33:19 DEBIAN10-3-JEEDOM /etc/mysql/debian-start[15830]: FATAL ERROR: Upgrade failed
avril 10 13:33:19 DEBIAN10-3-JEEDOM /etc/mysql/debian-start[15840]: Checking for insecure root accounts.
root@DEBIAN10-3-JEEDOM:/home/jeedom#
OK there are some complains about the mysql update, but it’s launched and working. We will need to check /etc/mysql/debian.cnf it is probably a sync default due to the password change for the root user, or re-enable unix_sockets for the root user by using the mysql commands:
ALTER USER 'root'@'localhost' IDENTIFIED WITH 'unix_socket';
FLUSH PRIVILEGES;
Now a quick sanity check inside mysql to verify it is using the new datadir.
MariaDB [(none)]> select @@datadir;
+---------------------+
| @@datadir           |
+---------------------+
| /home/jeedom/mysql/ |
+---------------------+
1 row in set (0.000 sec)
Perfect. We can now remove our old database directory.
rm -Rf /var/lib/mysql.bakFirst connection to Jeedom
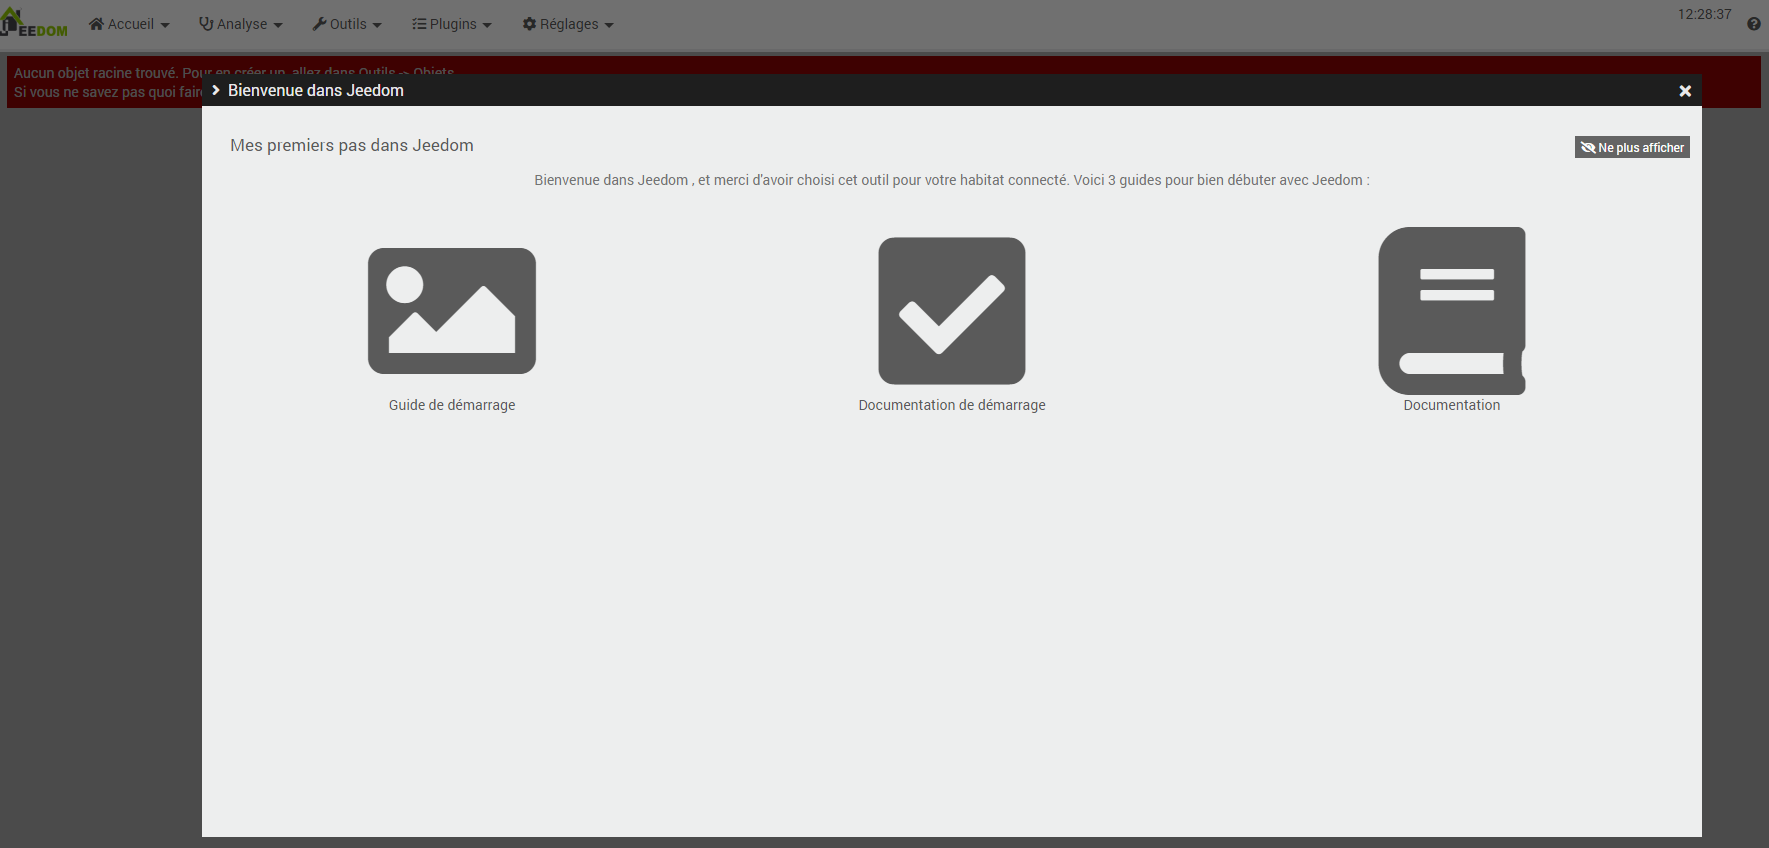
Now we will connect to our fresh Jeedom UI (by using http://<our vm ip>), and go for the graphical installation (sorry my screenshots are in French). Default Jeedom login/pass is admin/admin.
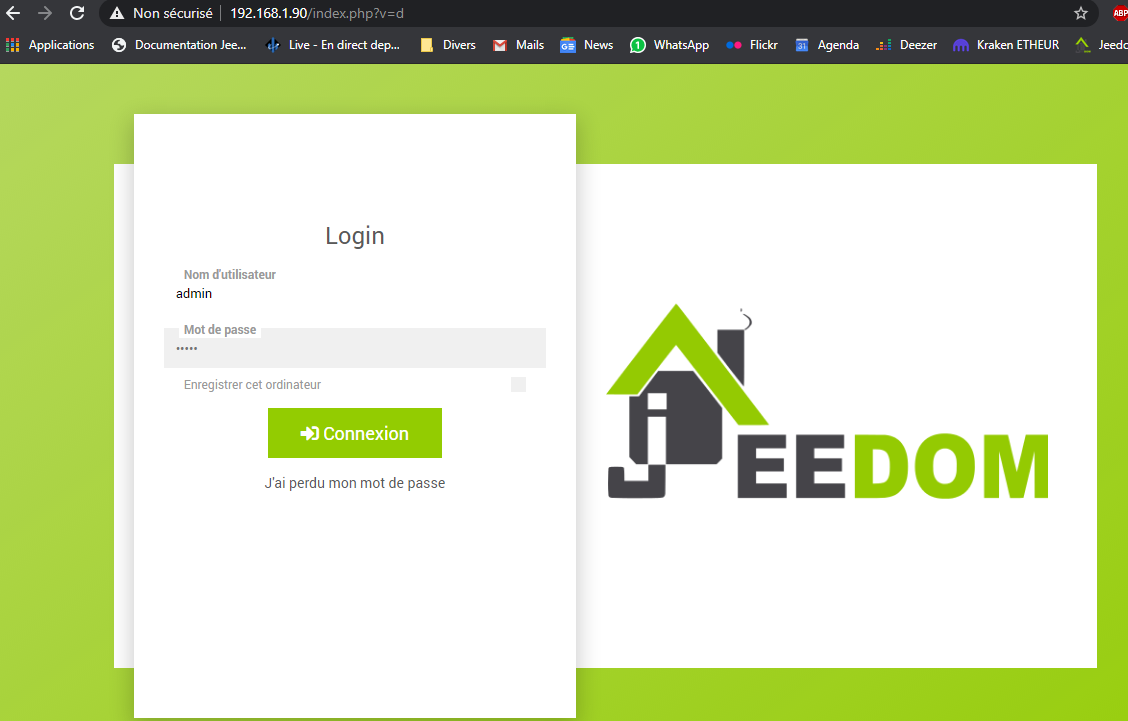
The UI will ask to change the default password. I’ll reuse the one i’m using on the Jeedom installation i’m restoring to avoid any mistake. In next screen I’ll give Jeedom my login/pass for Jeedom’s market. If you don’t have one yet there is a link to create one, this is mandatory if you want to install plugins.
After validating the market account, Jeedom will display its start page, very empty but that’s normal.
So, at this stage, we have a working standard Jeedom V4 installation, listening on port 80 of our VM. Fine but not enough.
Step 5: Apache configuration
I’ll tweak the Apache2 configuration to reach /home/jeedom/html as default directory (YES i could have used the -w /home/jeedom/html installation option, it would have been easier), to enable HTTPS and to use a personal TLS certificate generated by my host, the Gandi ISP.
Note that if we want to get more info in Apache2 log files, we will need to edit the /etc/apache2/apache2.conf “LogLevel warn” line to “LogLevel debug”.
In /etc/apache2/apache2.conf, I need to add the following lines:
# Sets the default security model of the Apache2 HTTPD server. It does
# not allow access to the root filesystem outside of /usr/share and /var/www.
# The former is used by web applications packaged in Debian,
# the latter may be used for local directories served by the web server. If
# your system is serving content from a sub-directory in /srv you must allow
# access here, or in any related virtual host.
<Directory />
        Options FollowSymLinks
        AllowOverride None
        Require all denied
</Directory>

<Directory /usr/share>
        AllowOverride None
        Require all granted
</Directory>

<Directory /var/www/>
        Options Indexes FollowSymLinks
        AllowOverride None
        Require all granted
</Directory>

<Directory /home/jeedom/html/>
        Options Indexes FollowSymLinks
        AllowOverride None
        Require all granted
</Directory>

#<Directory /srv/>
#       Options Indexes FollowSymLinks
#       AllowOverride None
#       Require all granted
#</Directory>
The lines 24 to 28 allows Apache to serve files (including the index if necessary) from /home/jeedom/html/ so that it can become available from the Web.
I check /etc/apache2/ports.conf to verify the default HTTPS listener port.
# If you just change the port or add more ports here, you will likely also
# have to change the VirtualHost statement in
# /etc/apache2/sites-enabled/000-default.conf

Listen 80

<IfModule ssl_module>
        Listen 443
</IfModule>

<IfModule mod_gnutls.c>
        Listen 443
</IfModule>

# vim: syntax=apache ts=4 sw=4 sts=4 sr noet
Lines 7 to 13 enable the HTTPS/SSL listener, if the ssl module or mod_gnutls modules are loaded.
I’ll modify the default ErrorLog directive in /etc/apache2/conf-available/security.conf so that it will log in /var/log/apache2, not in /var/www/html/logs. This directive could also have been used in a Jeed’om’s dedicated VirtualHost instead of modifying the default Apache2 install, but this whole VM is actually dedicated to Jeedom, so …
ErrorLog ${APACHE_LOG_DIR}/error.logNow I modify /etc/apache2/sites-available/000-default.conf to use /home/jeedom/html as default root dir and modify the log files. Here again this directive could have been used in a VirtualHost. Note that this default VirtualHost already contains a dedicated CustomLog and ErrorLog directives which also points to the default /var/log. All Apache error logs will now be to the same file.
<VirtualHost *:80>
        ServerAdmin webmaster@localhost
        DocumentRoot /home/jeedom/html
        CustomLog ${APACHE_LOG_DIR}/access.log combined
        ErrorLog ${APACHE_LOG_DIR}/error.log
</VirtualHost>

# vim: syntax=apache ts=4 sw=4 sts=4 sr noet
I modify /etc/apache2/sites-available/default-ssl.conf to configure the default HTTPS listener with a personal TLS certificate i got from my host Gandi, for my Jeedom’s FQDN.
<IfModule mod_ssl.c>
        <VirtualHost _default_:443>
                ServerAdmin webmaster@localhost

                DocumentRoot /home/jeedom/html

                # Available loglevels: trace8, ..., trace1, debug, info, notice, warn,
                # error, crit, alert, emerg.
                #LogLevel info ssl:warn

                ErrorLog ${APACHE_LOG_DIR}/errorSSL.log
                CustomLog ${APACHE_LOG_DIR}/accessSSL.log combined

                #   SSL Engine Switch:
                SSLEngine on

                #   Real certificate, replace with your files!
                SSLCertificateFile      /etc/ssl/certs/public_cert.2048.crt
                SSLCertificateKeyFile   /etc/ssl/private/private_key.2048.key
                SSLCertificateChainFile /etc/ssl/certs/GandiStandardSSLCA2.pem

                <FilesMatch "\.(cgi|shtml|phtml|php)$">
                                SSLOptions +StdEnvVars
                </FilesMatch>
                <Directory /usr/lib/cgi-bin>
                                SSLOptions +StdEnvVars
                </Directory>
        </VirtualHost>
</IfModule>

# vim: syntax=apache ts=4 sw=4 sts=4 sr noet
Note that the default HTTPS VirtualHost will use /home/jeedom/html as root; we may also tweak the SSL log files. Also, three lines are dedicated to point the public certificate (CRT file) in which our public key is embedded, its associated private key (KEY file), and the list of trustes authorities which emitted and digitally signed our public certificate. Those are the files i will later need to backup from my Debian8.5 Apache2 dir and restore on this Debian10.3 Apache2.
We’ll also enable SSL with the a2enmod apache command, and make the default-ssl.conf file loadable by Apache2 by linking it from sites-available to sites-enabled:
a2enmod ssl
cd /etc/apache2/sites-enabled
ln -s /etc/apache2/sites-available/default-ssl.conf default-ssl.conf
I backup the SSL certificates used on my previous Jeedom installation, copy it on this new VM, and restore it. On the old Debian 8.5 VM, i’ll archive in a TAR GZ file the required files.
tar cvzpf /home/jeedom/certs.tgz /etc/ssl/certs/public_cert.2048.crt /etc/ssl/private/private_key.2048.key /etc/ssl/certs/GandiStandardSSLCA2.pem
chown jeedom:jeedom /home/jeedom/certs.tgz
I use scp on the new Debian10.3 VM to download the archive:
scp <OLD_JEEDOM_IP>:/home/jeedom/certs.tgz /home/jeedom/
cd /
su -
tar zxvfp /home/jeedom/certs.tgz
Then I check Apache configuration, and I restart Apache.
apache2ctl configtest
Syntax OK
service apache2 restart
Now i’ll check if my ports 80 and 443 are opened:
netstat -anp | egrep '80|443'The output is good, we see there are listeners on ports 80 & 443, from apache2 processes:
tcp6 0 0 :::80 :::* LISTEN 2198/apache2
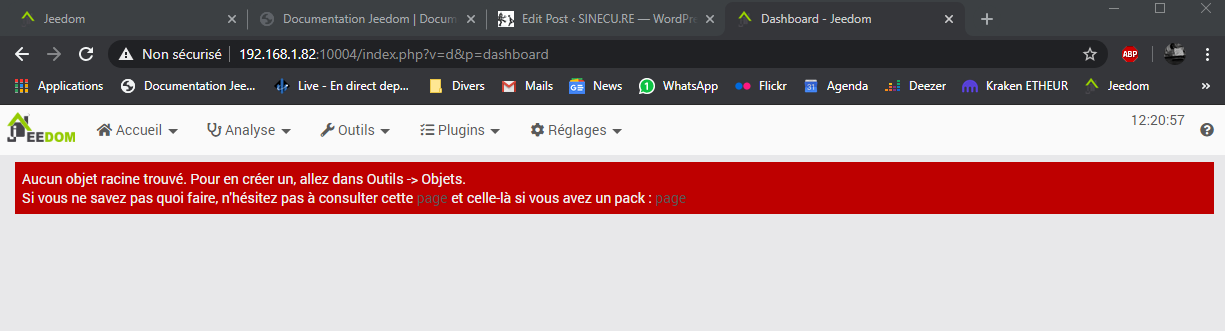
tcp6 0 0 :::443 :::* LISTEN 2198/apache2Now let’s try to reach Jeedom UI (first by using http://192.168.1.82):

And now by using https://192.168.1.82:
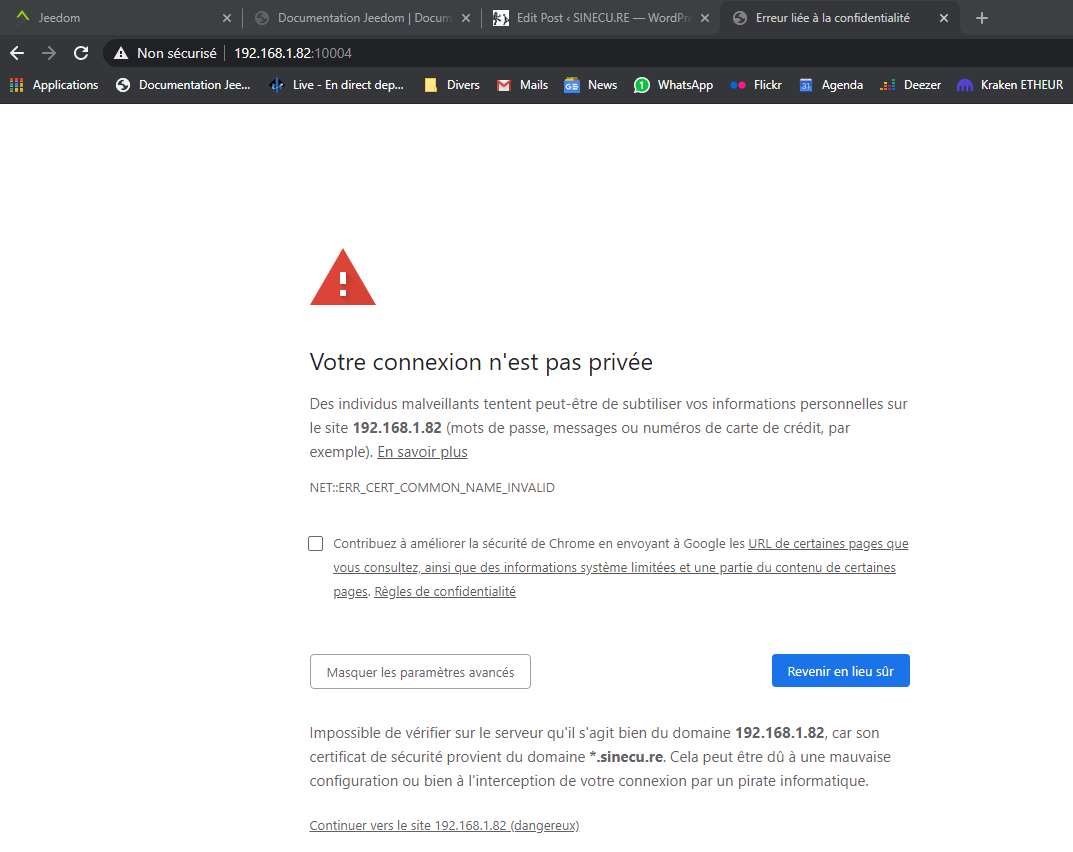
This warning is normal as i’m reaching the UI by using the VM’s IP, not the FQDN defined in the TLS server certificate I told Apache2 to use in my default-ssl.conf file. When I validate the warning I can access Jeedom’s UI. Also, another test performed from “outside” my local network (my ISP’s obscures routing tables wouldn’t let me perform this test from inside), by using its FQDN, is functional without any warning.
Now, as my actual ISP is still not providing me a static external IP, and it changes once or twice per month, i’ll want to backup & restore the little script used to update my public dynamic DNS record on Internet so that I can permanently reach Jedom from the outside, and other small stuff. This script is based on a public project and it uses Gandi’s public APIs.
On the Debian 8.5 box:
tar cvzpf various.tgz gandi-live-dns philips_android_tvOn the Debian 10.3 box, i’ll copy it with scp, untar it, and install a required python package to make it work.
scp <OLD_JEEDOM_IP>:/home/jeedom/various.tgz ./
tar zxvfp various.tgz
sudo pip install requests
Then I need to add a crontab job to check my ipaddress & eventually update it:
sudo crontab -eThen I add this line to run the python script every 30 minutes and output its log in a /var/log file.
*/30 * * * * /home/jeedom/gandi-live-dns/src/gandi-live-dns.py > /var/log/gandi-live-dns.log 2>&1Step 6: Aeotec Gen5 Zwave stick backup
Now I will backup the Aeotec Zwave USB stick still used on the old running Debian 8.5 Jeedom installation.
About the Aeotec ZWave stick (thanks to Nechry an active contributor for Jeedom about his article):
- Windows 10 will already have the driver or it will be downloadable automatically, for other OS or to get the inf files manually check here
- you’ll need the ZWave “Network Key” for the stick, it will probably be the default key, but in doubt in my old Jeedom installation i’ll check it in resources/openzwaved/ozwave/manager_utils.py, it will be a (very secure …) 16 hexa values suite: « 0x01, 0x02, 0x03, 0x04, 0x05, 0x06, 0x07, 0x08, 0x09, 0x0A, 0x0B, 0x0C, 0x0D, 0x0E, 0x0F, 0x10 » which will need to be converted as « 01 02 03 04 05 06 07 08 09 0A 0B 0C 0D 0E 0F 10 » in the backup utility
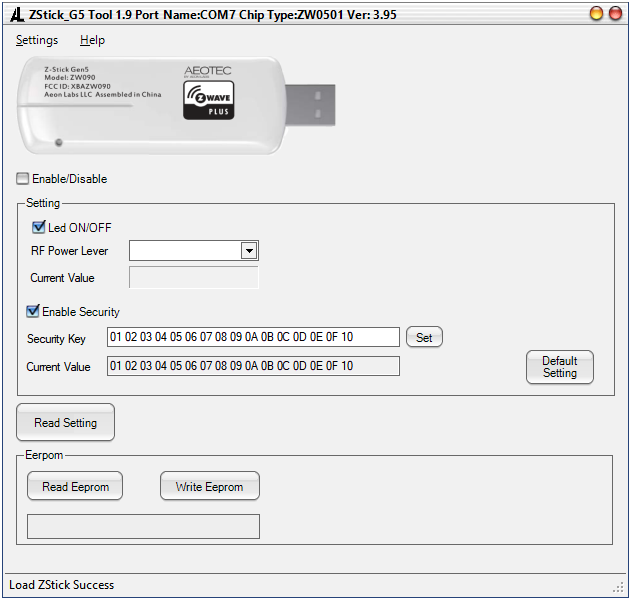
On my W10 laptop, on which I never plugged this USB stick, Windows automatically configures the device, and then I launch the zwave_500.exe utility downloaded from Aeotec’s website.
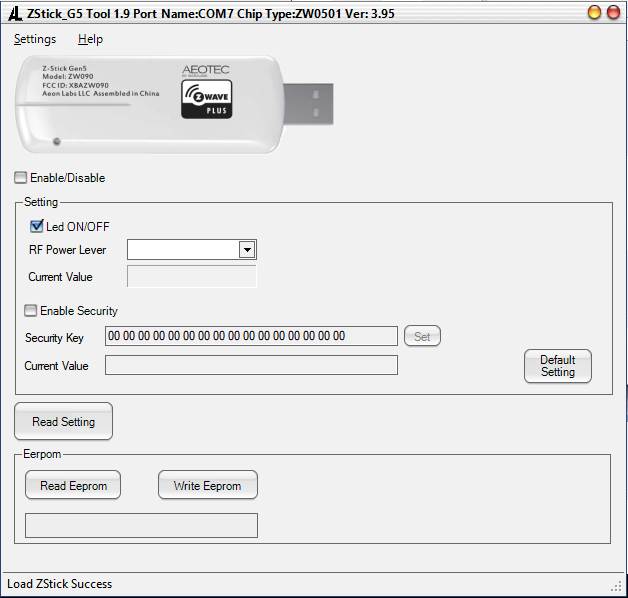
I can check the stick is well detected because it displays a COM port in the title bar, and a “Load Zstick Success” in the status bar at the bottom of the window. Then I need to check « Enable Security » and enter my network/security key and click “set”.
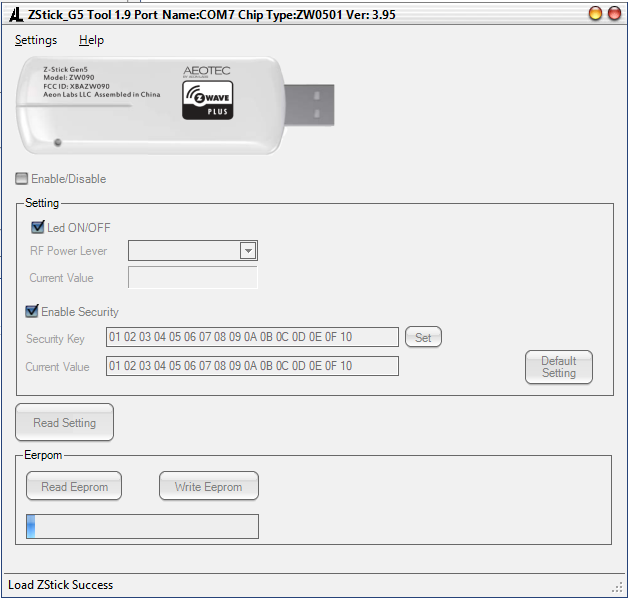
Then I click on “Read Eeprom” button and choose where to save the backup file. And get a coffee …
We’re done. This file is precious for you, please store it with attention: all paired devices configurations, and ZWave network configuration, are stored on your ZWave controller. If your ZWave stick needs to be changed, this file is the only way to restore tour entire ZWave network with having to re-enroll every ZWave device. Jeedom’s backup/restore operation does not contain the ZWave network.
Beware: this backup will only be usable on another similar Aeotec stick (they performs very well). I strongly recommend you always have an available spare one.
Step 7: Jeedom backup & restore
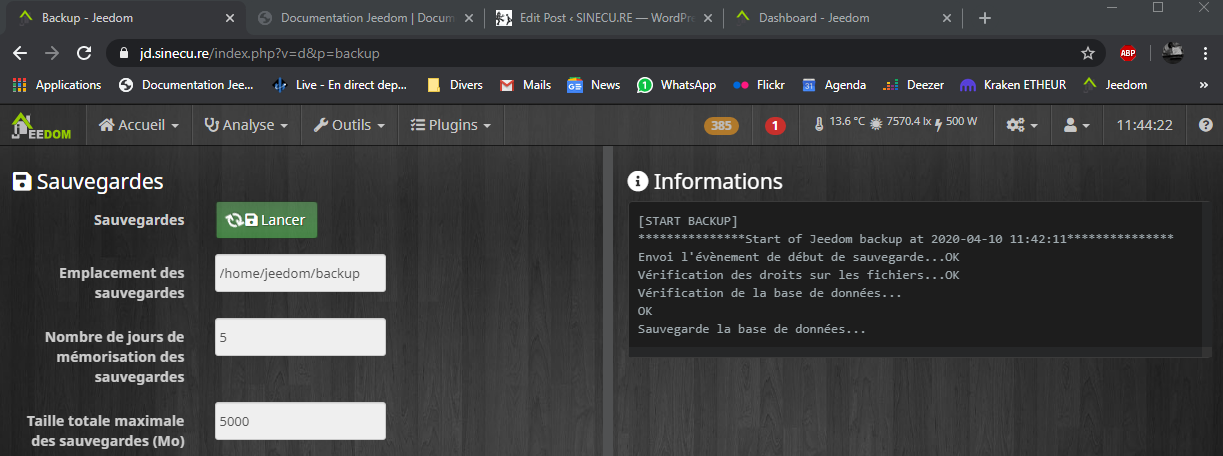
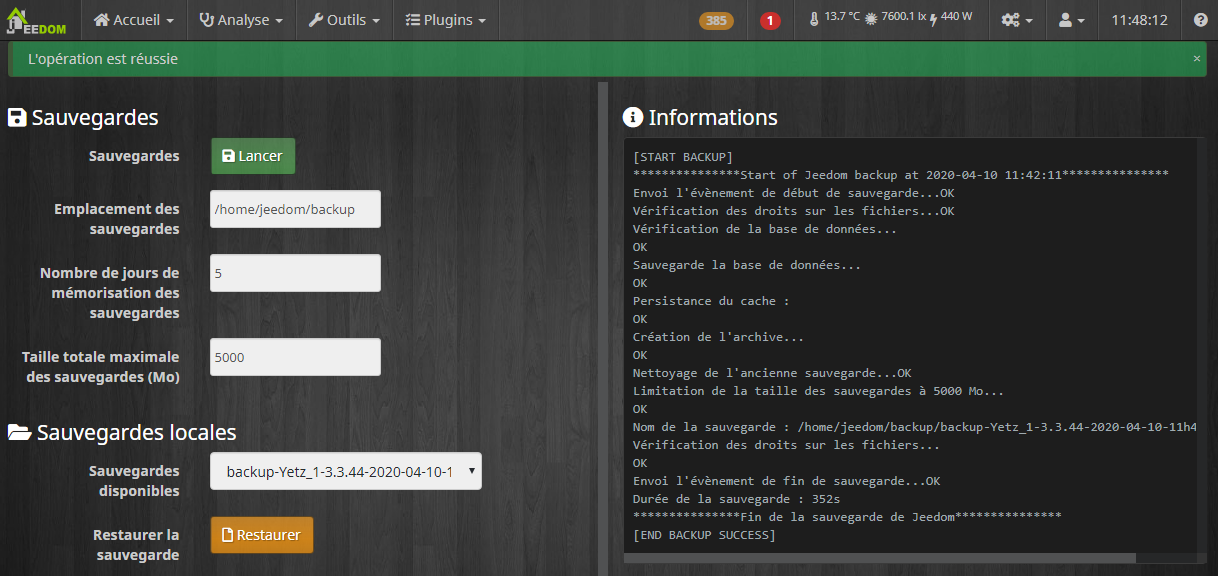
Backuping the old functional Jeedom
I need to save my whole functional Jeedom, through its integrated backup functionality.

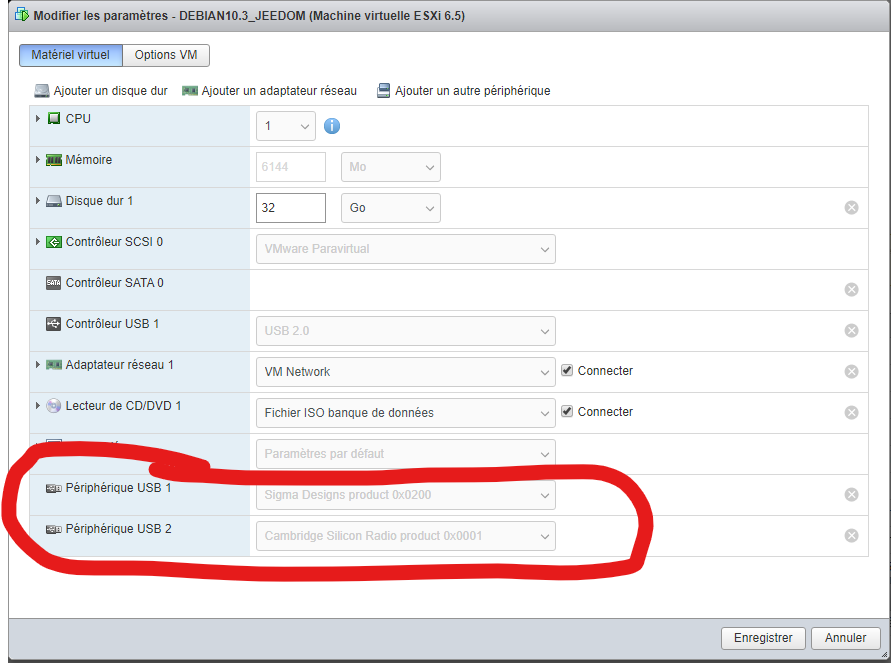
Restoration on the new VM
First, i’ll go back in vSphere administration UI to reallocate my Aeotec Zstick, and bluetooth module to the new VM. This is really simple, just unallocate them from the old Debian8.5 VM, and reallocate them as a new USB device to the new VM.
I copy the backup on my Debian 10.3 Box, in the standard html/backup directory of Jeedom in its HOMEDIR I previously changed. I also change its permissions to be sure it will be readable by Jeedom and more specifically by Apache with its www-data user.
#on new VM
cd /home/jeedom/html/backup
sudo scp jeedom@<OLD_JEEDOM_IP>:/home/jeedom/backup/backup-Yetz_1-3.3.44-2020-04-10-11h42.tar.gz ./
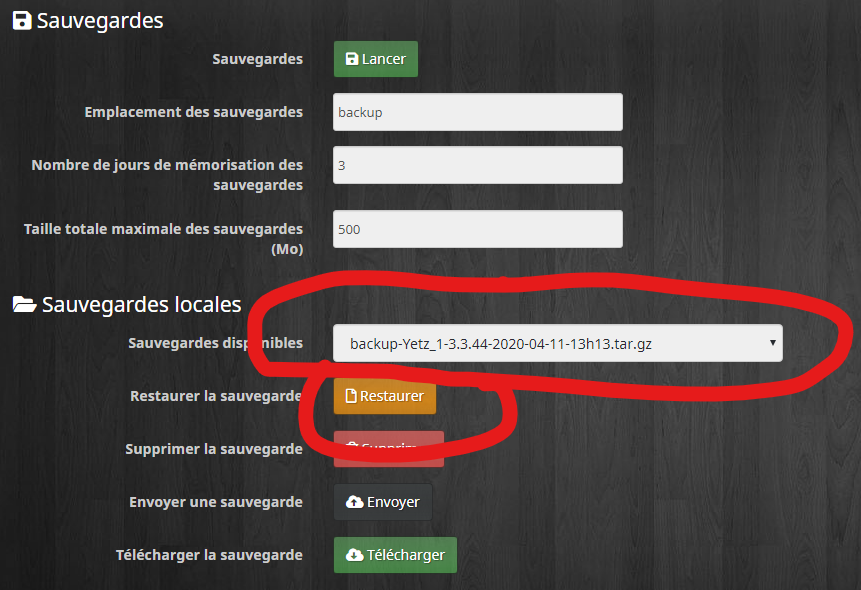
sudo chown www-data:www-data backup-Yetz_1-3.3.44-2020-04-10-11h42.tar.gzNext, I will restore it via the user interface of the “new” Jeedom (sorry, this is a screenshot of the Jeedom v3 backup UI; I forgot to take one of the new V4… But it’s almost the same).
It will be a long task, and the UI may not update well as files will be deleted and restored. You should be able to follow the restoration process through internal jeedom log file:
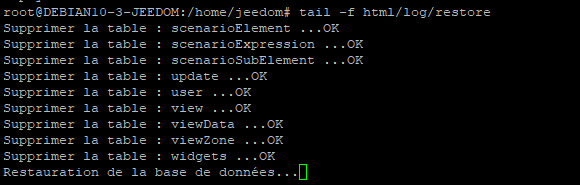
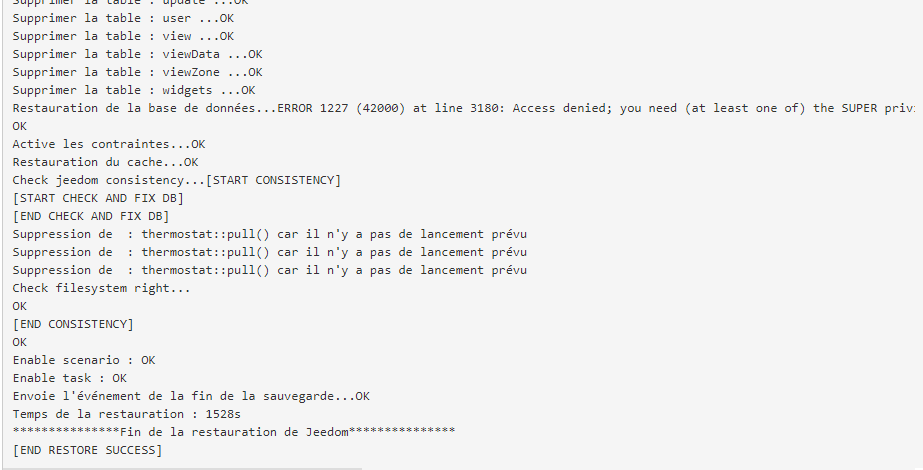
OK so obvisouly there was a MySQL/MariaDB error, but the result is still OK … I corrected the step 4 in this guide so that this error won’t happen anymore: the jedom Mysql user didn’t have the SUPER privileges, which can be a problem if the backup contains “DEFINER=” instructions. Step 4 now includes a GRANT SUPER ON *.* TO 'jeedom'@'localhost'; instruction.
Now i’ll shut off properly (shutdown -h now) the old Debian 8.5 Jeedom. This is not mandatory though as both VMs doesn’t have the same IP address, but I prefer.
I perform a sanity reboot on the new Jeedom, I reconnect on its UI, I can see its dashboard.
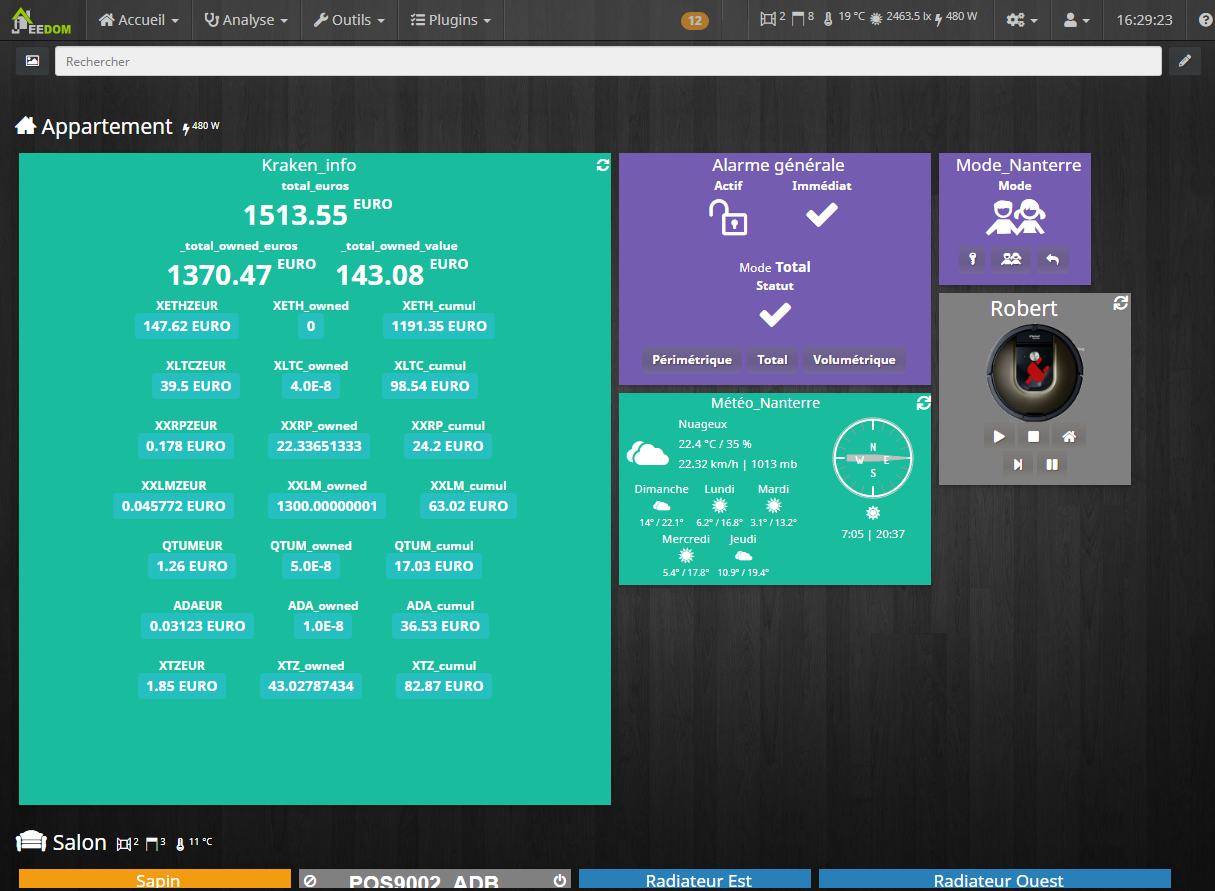
At this point, Jeedom should be fully operational. The remaining steps mainly consist of restoring the plugins, checking that all network settings are correct for your new home automation box, and that all automations are working.
Step 8: final steps
A few things need to be tweaked.
Network configuration
Check Jeedom > Health menu.
Jeedom will probably complains about the external network configuration. This is normal, you need to check two things:
- In the network configuration menu in Jeedom, where you fix both internal and external addresses, you need to check if the configuration that was restored is still the good one (in my case it is not, as the new Jeedom is not using the same internal IP as the old one).
- On your router, where you probably had a port forwarding so that your Jeedom’s installation is reachable from the outside, you also need to use the new internal IP as the target IP.
- Or, you could assign your old Jeedom VM’s IP to the new one on your DHCP server.
Market configuration
In Jeedom > Update Center, a message tells me that I have too many Jeedom devices registered. This is normal, because I use several installations of the “free” version of Jeedom and I connect to the market from the same account, which is limited to two installations with the free version. I logged into the market website, checked which installations I had registered, and deleted the old one, as I will no longer be using it after this migration.
Reinstall plugins dependencies
You need to reinstall the dependencies for all your plugins, this is VERY important: Bluetooth Advertisement, ZWave, KRoomba, etc. By using this Debnian 10.3 installation, I had absolutely NO problem with dependencies building, the modules were working well, no additional manual operation to perform.
Conclusion & Next Steps
All my scenarios, settings, were perfectly restored … I spent a few days on making this tutorial and finding the good VM parameters & restoration process, but it was definitely needed for the health of my home automation. Now that I know a little bit more Jeedom, I know the Mysql & Apache tweaking sections can be simpler, mainly by using the -m and -w options on jeedom’s command line installer.
The main things that complexified a little bit the process is that I chose not to store Jeedom in its default /var/www/html directory and put the MySQL/MariaDB database file in a separate directory also. Those are not standard operations and I prefer them to be documented here, it may be useful for other people, at least I hope so.
Migrating Jeedom from one Debian VM to another is entirely feasible with careful preparation, especially in separating home and database directories, ensuring backups, and thoughtfully restoring users and privileges. In this guide, you’ve seen how to handle non-standard locations (/home/jeedom, custom SQL datadir) and troubleshoot permissions/privileges issues post-restore.
Don’t forget:
- Always check Jeedom Health and logs after migration.
- Update all plugin dependencies and verify automation scenarios.
- Regularly back up both your Jeedom setup and Zwave stick for disaster recovery.
- Double-check MySQL user privileges if “SUPER” errors arise during backup restoration.
- For a deeper dive into plugin-specific issues or advanced setups, see my other articles linked below.
Related articles on the blog:
- Monitoring electricity consumption with Jeedom and a USB over IP Teleinfo Modem
- Automatic programmable outdoor watering system with Jeedom
- Quick tutorial: installing Debian raspbian on a Raspberry Pi (Zero)
Recommended external resources:
- Official Jeedom documentation (EN)
- MariaDB: Privilege compatibility information
- Community: MariaDB/Jeedom restore troubleshooting
If you found this guide useful, check out other articles in the Domotique or Linux categories.
Discover more from SINECU.RE
Subscribe to get the latest posts sent to your email.